If you want to create an Active Directory environment in a non-production environment, doing so in Proxmox is a great way since you can use many of the features of Proxmox such as backups, snapshots, cloning, etc. This post will go through the setup process of creating an Active Directory environment.
To get started, we will need a Windows Server 2022 Server VM, as well as a few Windows 11 VMs. The Windows 11 VMs must be running a version that supports joining a domain, which includes Windows 11 Professional, Enterprise, and Education.
I have templates made for Windows Server 2022 and Windows 11 Enterprise in my Proxmox server. These are both running the evaluation editions from Microsoft.
Proxmox Network Setup
To begin, you will need to create a bridge under Proxmox so that the VMs can communicate with each other. The bridge created will only be used for the Windows Active Directory environment. You can see this in the diagram below.
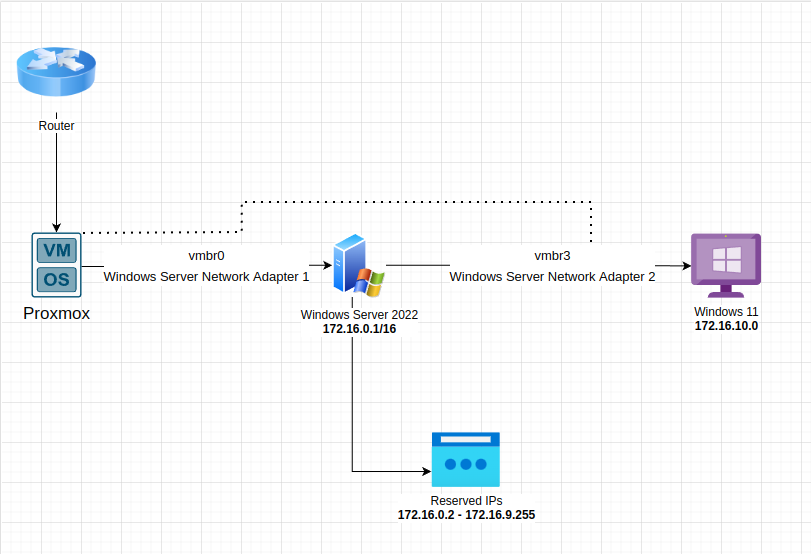
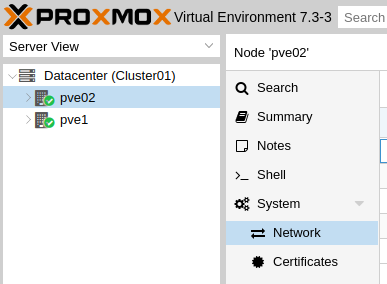
To create the Linux bridge, go to your Proxmox web interface, click on your node name, then go to System > Network.
You will need to create a new Linux Bridge. To do so, click on Create > Linux Bridge. Add a comment to signify that this will be the bridge used for the Active Directory Home Lab. The bridge I will be using is named vmbr3. After the Active Directory lab is configured, we can bridge a port to the vmbr3 bridge. This will let us use a network adapter connected to the Proxmox server to connect physical Windows devices to the Active Directory domain.

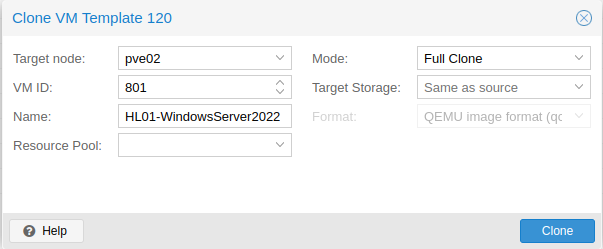
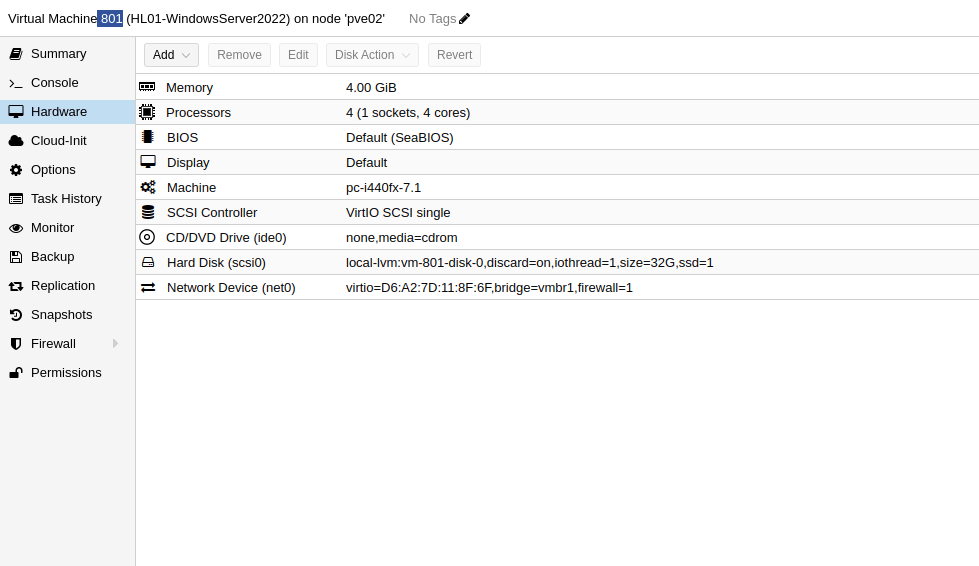
vmbr3).The next step is to create a clone of Windows Server 2022. Right click on the template, and select Clone. Change the mode to Full Clone, give it a VM ID (I choose 801), and choose a name for it. I will name mine HL01-WindowsServer2022. Then click Clone.
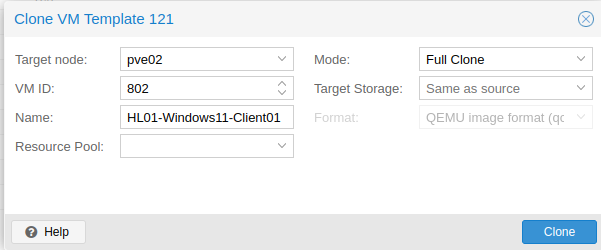
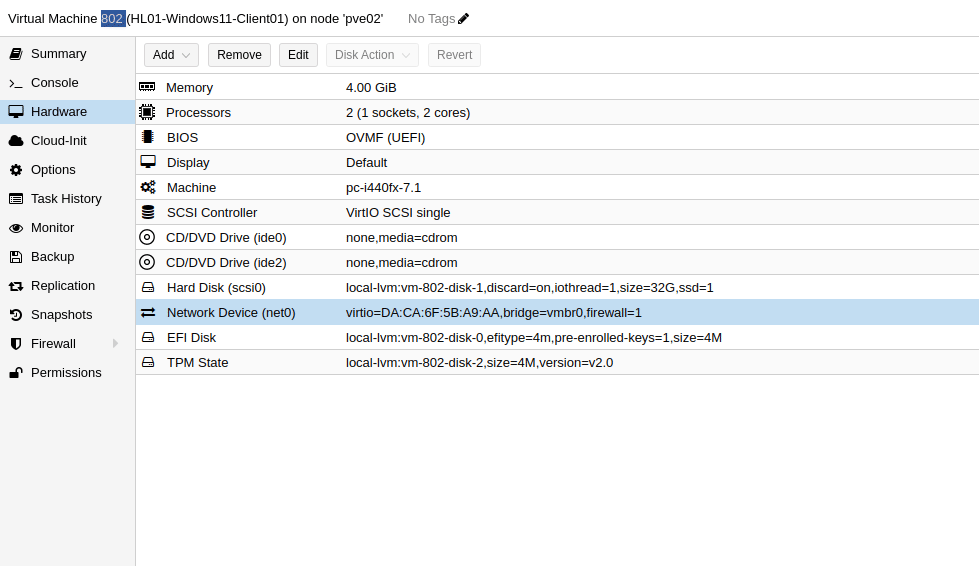
Do the same for the Windows 11 template. I named my Windows 11 VM HL01-Windows11-Client01 and gave it a VM ID of 802. Make sure you change the mode to Full and click Clone.
The time it takes to fully create the VM under Proxmox can vary depending on your hardware.
The next step is modify the network devices of each VM. The Windows Server 2022 (VM ID 801) will act as the default gateway, so it needs to have two network adapters. I will add a network device and choose the Linux Bridge we created earlier ( vmbr3). Make sure the model of the network device is VirtIO (Paravirtualized). The other network device is attached to a Linux bridge that has internet access (vmbr1 in the following image).
vmbr3 bridge created earlier.On the Windows 11 VM, we now have to change the bridge of the current network device to be vmbr3 as that is the one we created earlier. The Windows 11 VM will then communicate with the Windows Server via the network device connected with the bridge vmbr3.
Windows Server 2022 Setup
Now we're ready to start up our Windows Server 2022 VM. The initial setup is similar to previous Windows installations. Set the local Administrator password and login. Select Yes when you are asked if you want to allow your PC to be discoverable by other PCs.
The first thing to do is to rename the Windows Server. Go to Settings > System > About. Then choose Rename this PC. I named mine DC01 and choose Restart Later.
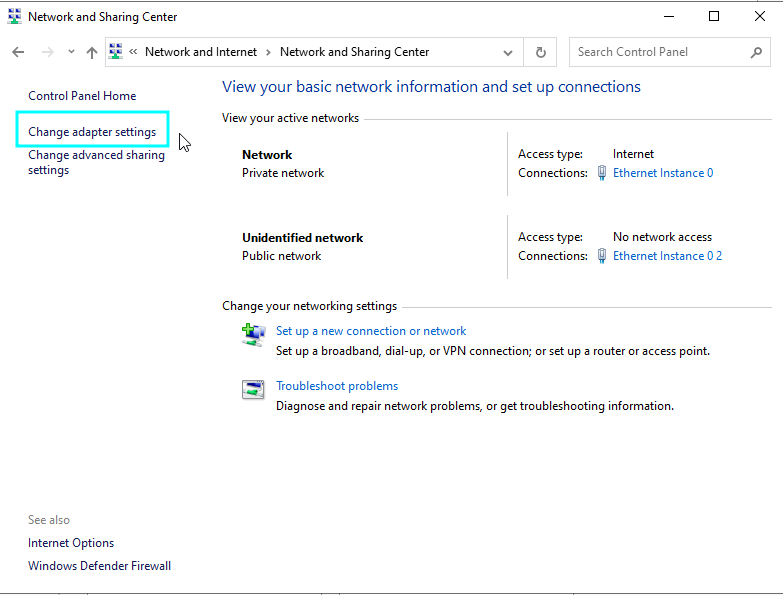
The next step to do before rebooting is to rename the ethernet adapters. Go to Control Panel > Network and Internet > Network and Sharing Center. Then choose Change adapter settings.
One of the network adapters should have internet connectivity. You can identify which one by double clicking on them and seeing if they have internet connectivity.
Rename them so that you know which one has an active internet connection. I renamed mine Internet. I then renamed the other ethernet adapter as Internal. I restarted the VM at this point.
We then have to set an IPv4 range for the AD network. You can so this by once again going to Control Panel > Network and Internet > Network and Sharing Center. Then choose Change adapter settings.
Double click the Internal network device, click on Properties, select Internet Protocol Version 4, and click Properties.
In the Properties tab, you have to select a private IP range that will not interfere with your current network.
The IP range I chose for my home lab is 172.16.0.1/16. You can find more info about the private IP ranges in RFC1918 here.
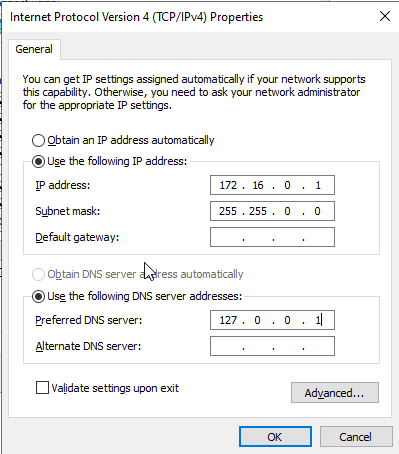
172.16.0.1, with a /16 subnet.The IP of the domain controller is set to 172.16.0.1, with a /16 subnet. I did not specify a gateway as the domain controller will act as the default gateway. I specified the localhost address (127.0.0.1) as the DNS server as the domain controller will serve as a DNS server. Select OK and the close the Properties window.
Setup Active Directory Domain Services
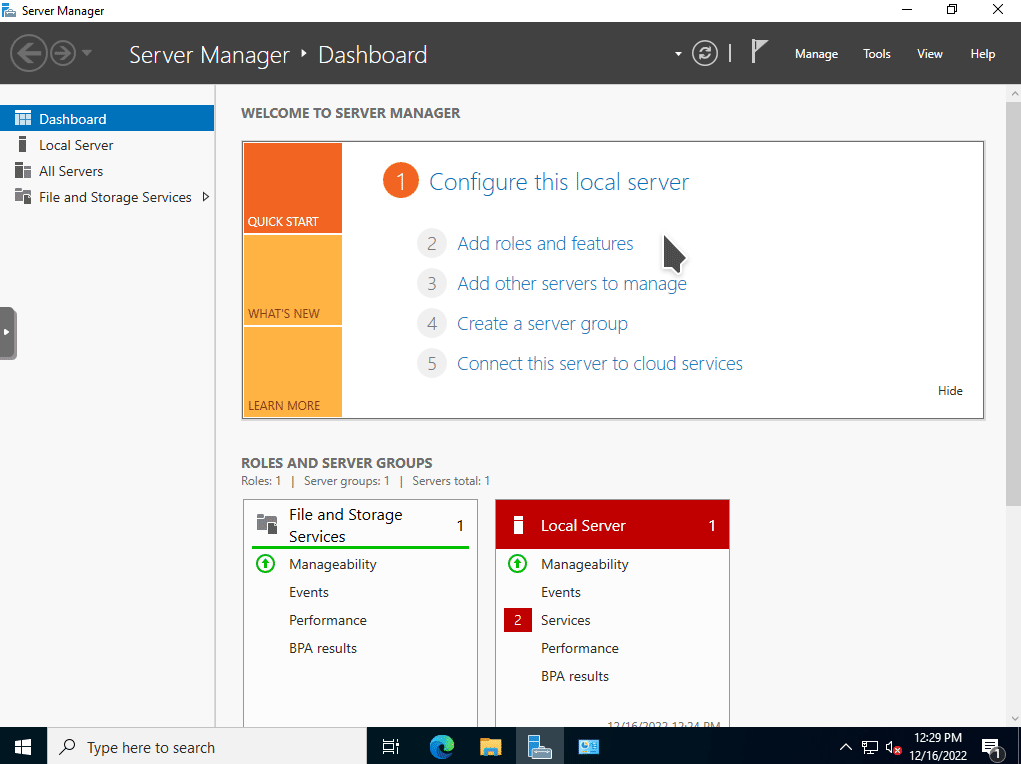
The next step is to setup Active Directory Domain Services. To do so, open Server Manager and lick on Add roles and features. Select Next to accept the default settings until you're prompted with the Server Roles section. Choose Active Directory Domain Services, confirm by clicking the Add Features button, then lick on Next to accept the default settings until you can select the Install button. Once it has installed successfully, select Close.
The next step is to promote the server to a domain controller. You will need to have the domain name you want to use in the next step. There are several best practices when choosing a domain name, such as having a FQDN from a top-level registrar. You can find some of Microsoft's best practices here. Because I am deploying this in a home lab environment, I will choose the domain name of mydomain.com.
To promote the server to a domain controller, click on the notification icon on the top section of the Server Manager program. Then select Promote this server to a domain controller. Select Add a new forest as this in a newly created AD environment. Enter the domain name in the Root domain name: area.
You will then need to set a password for the Directory Services Restore Mode. Enter a secure password and click Next. Accept the default settings for the following prompts by selecting Next. You will receive some warnings but these are okay for our home lab environment use case. This process can take a while so be patient. The Windows Server 2022 VM will restart automatically when the process is completed.
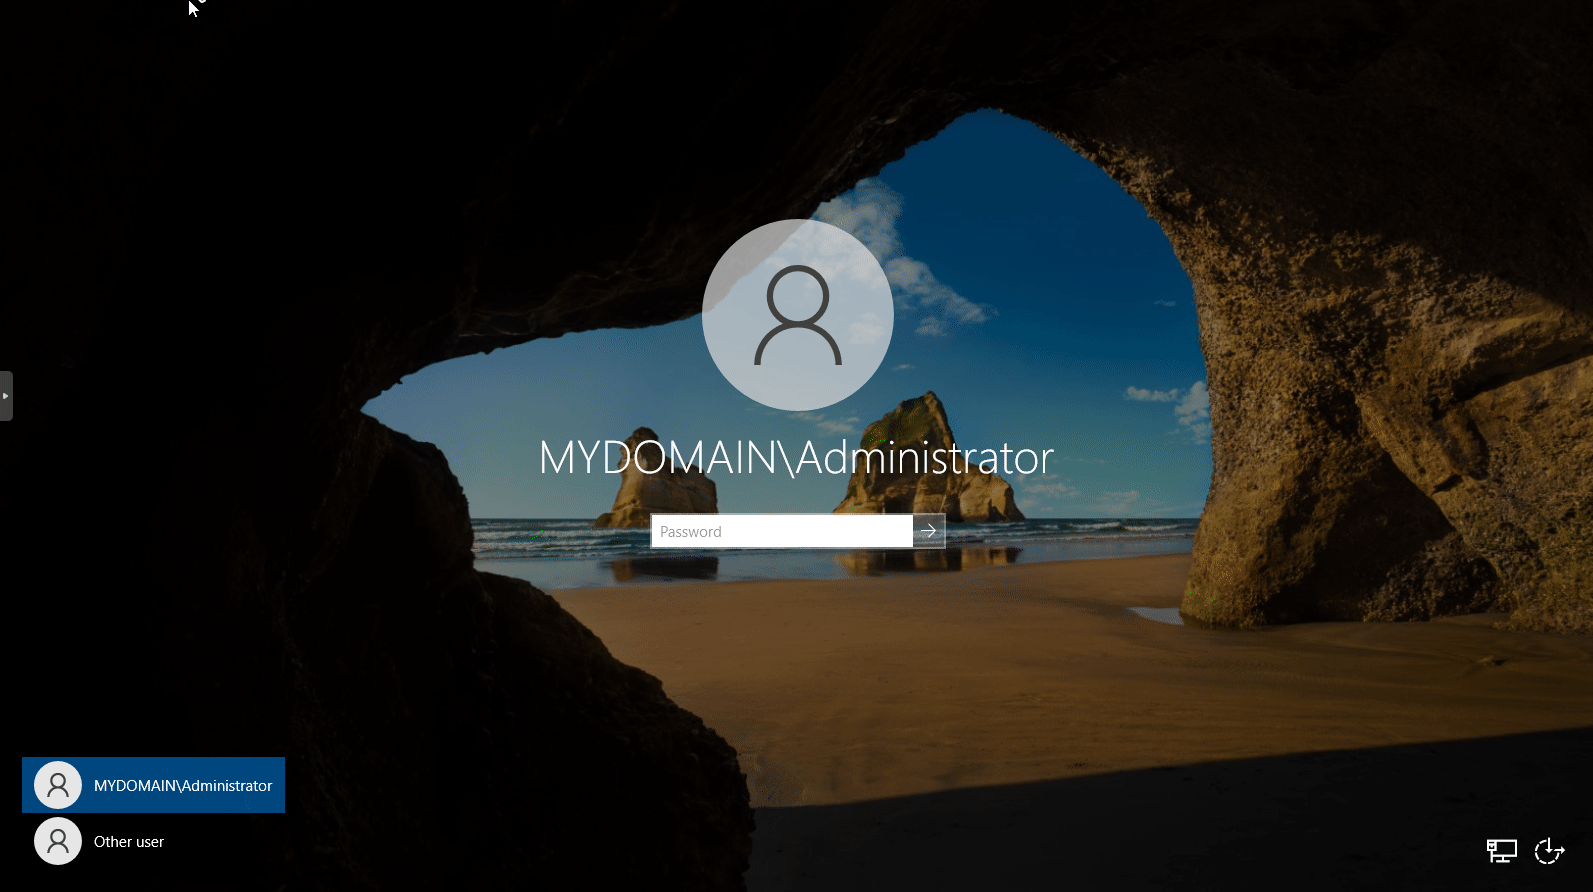
Once the Windows Server has rebooted, you will see the login screen show the domain entered in the previous step.
Create a domain administrator account
The next step we want to do is to create a domain administrative account. This is a good practice and it can enable proper monitoring of logs to see who accesses the server and what changes they may make.
First, we have to login with the built in Administrator account. To create a domain administrative account, we need to open Active Directory Users and Computers. This can be found in the Start menu under Windows Administrative Tools.
Expand the mydomain.com section (or whichever domain name you chose previously). Right click on mydomain.com and select New > Organizational Unit (OU).
I created two OUs called _IT Staff and _Staff. I unchecked Protect container from accidental deletion as this makes it easier to manage in my home lab environment.
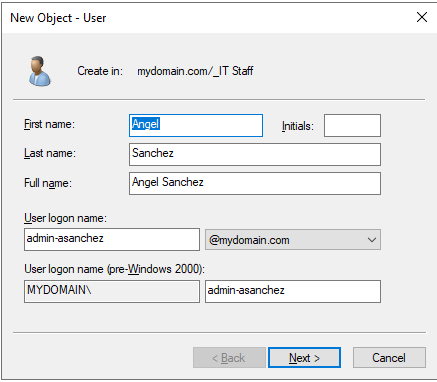
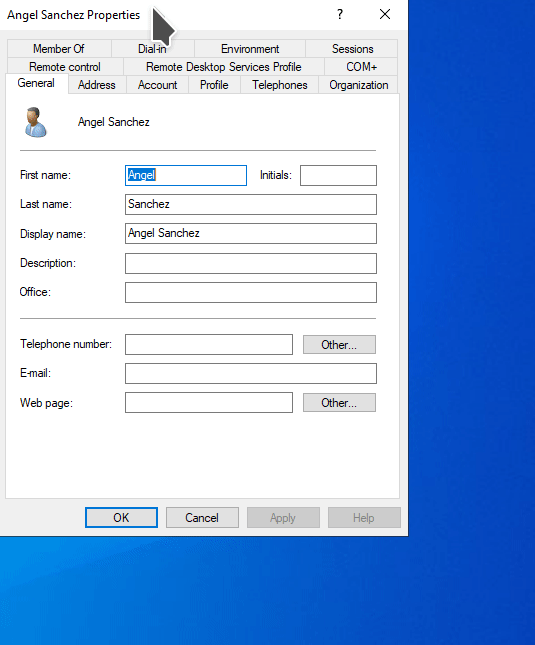
To create an IT Adminstrator, I right clicked the _IT Staff OU, then selected New > User. In the pop up windows, enter the credentials for the domain administrator account you want to create. In most organizations, usernames are created by using the first initial of their first name, followed by their last name. Because I am creating an administrative account, I want to denote this is the User logon name section. I will be denoting administrative accounts by adding the prefix admin- to the User logon name.
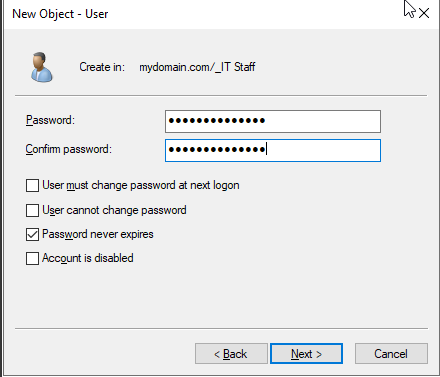
Then set a password for the account. I disabled the option User must change password at next logon and the Password never expires because I am deploying this in my home lab environment. In an organization, this option should be checked so that the end user can set their own password. In an organization, Password never expires may need to be unchecked depending on their password policy requirements.
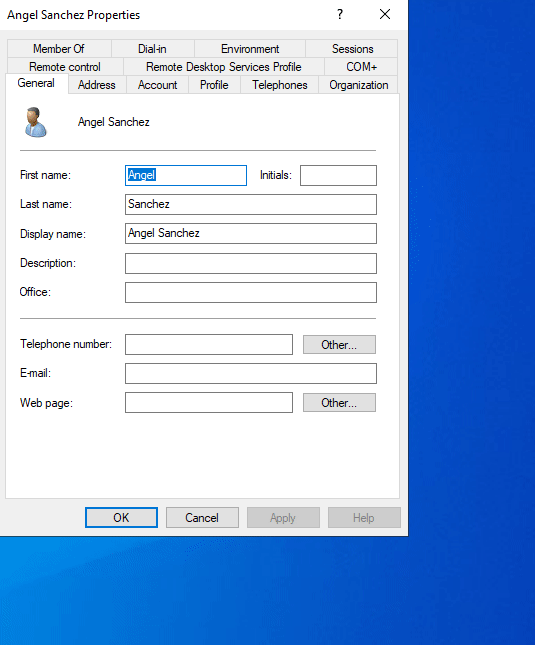
Now we need to add the newly created account to the Domain Admin group. This can be done right clicking the newly created user and selecting Properties.
Select the Member of tab. You will notice that the user is a member of the Domain Users group. Click on Add. You will get a pop up titled Select Groups. Under the Enter the object names to select section, click on the Advanced button. Then click Find now button on the pop up window. Select Domain Admins and click OK.
Domain Admins object name to add the user to that group.NOTE: If you know the name of the object name, you can type it in when the Select Groups pop up windows shows up as shown below.
We can then logout of the Administrator account and login with our newly created domain account.
Installing RAS/ NAT
The next step is to install RAS/NAT. If we take a look at the network diagram, this will allow the AD clients to receive Internet access via the domain controller.
To get NAT installed, we have to once again open Server Manager. Select Add roles and features. Select Next to accept the default settings until you reach the Server Roles section. Select the Remote Access checkbox as this will install NAT. Select Next. Then when you get to the Role Services section, enable the Routing checkbox, and click on the Add Features button. This should auto select the DirectAccess and VPN (RAS) checkbox. Select Next > Next > Next. Then click on the Install button and wait for the features to get installed.
Next, go back to the Server Manager program. Then click on Tools > Routing and Remote Access.
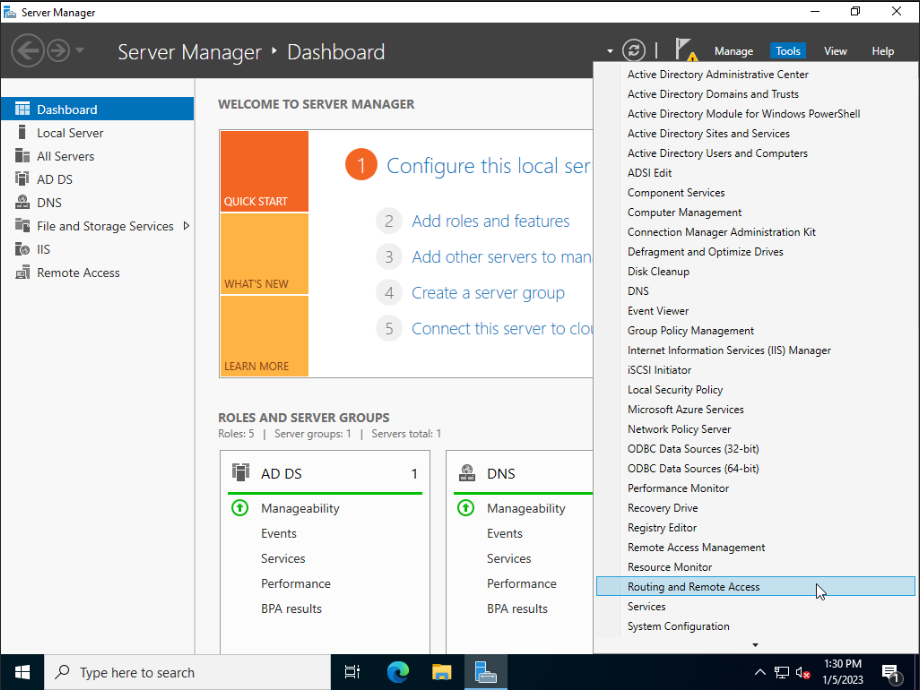
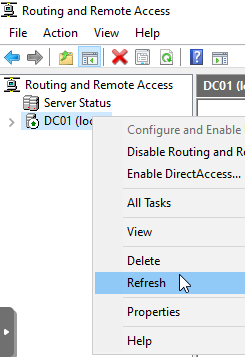
Tools > Routing and Remote AccessIn the Routing and Remote Access window, right click on the domain controller's name (DC01) and select Configure and Enable Routing and Remote Access. Select Next and then choose Network Address Translation (NAT). Select Next.
NOTE: If you don't see any network adapters in this step, close the wizard and close the Routing and Remote Access windows. Reopen it and they should appear.
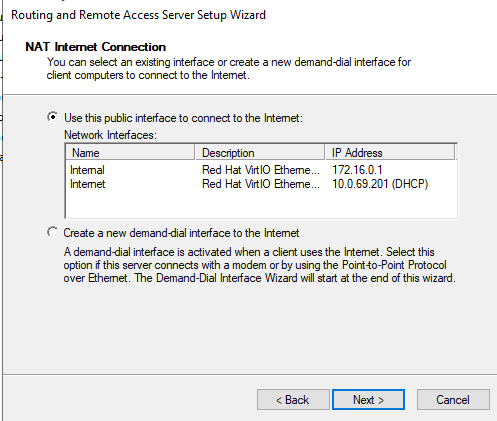
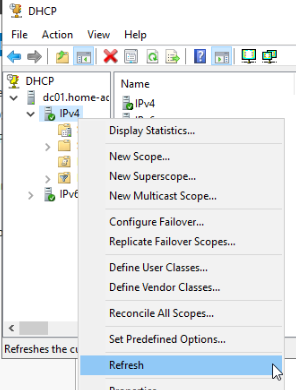
Because we labeled the devices earlier, we can see which adapter is being used for internet access. Select the one labeled Internet and click Next. Then select Finish. If you don't see any changes, you might need to refresh by right clicking the domain controller's name and selecting Refresh.
Setting up the DHCP Server
The next step is to setup the DHCP server on the Windows Server. This can be done by going to the Server Manager program. Click on Add roles and features. Select Next until you reach the Server Roles section. Select DHCP Server from the list and click on Add Features in the pop put window. Select Next to accept the defaults settings and then select Install.
To complete the DHCP configuration, you have to click on the Notifications flag icon in Server Manager and select Complete DHCP Configuration. Specify the credentials to be used to authorize this DHCP server in AD DS. I chose the domain account I created earlier admin-asanchez.
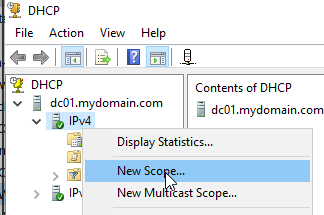
We then have to configure a DHCP scope. To do so, go to Server Manager once again. Then select Tools > DHCP. Expand the available options and then right click on IPv4 to create an IPv4 scope.
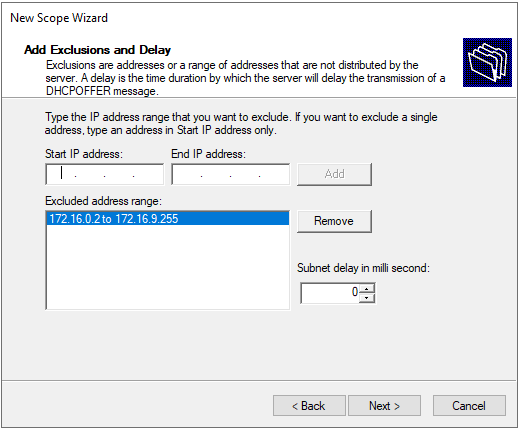
Set a name for the scope and give it a description if you wish to do so. Select Next. Now to select the scope for the IPv4 addresses, we have to refer back to our initial network diagram. We chose to implement a 172.16.0.1/16 network. This gives us the available IP range of 172.16.0.2 to 172.16.255.254 with over 65,000 available IP addresses.

Then you can exclude some IP addresses from being handed out by the DHCP server. I choose to exclude the IP ranges of 172.16.0.2 to 172.16.9.255. The first available IP address the DHCP server should hand out would be 172.16.10.0. I reserved these addresses so I can know that devices with those IP addresses were manually assigned. This lets me organize devices and manage their network access. I use this feature in my own network to easily identify devices such as printers, managed switches, etc.
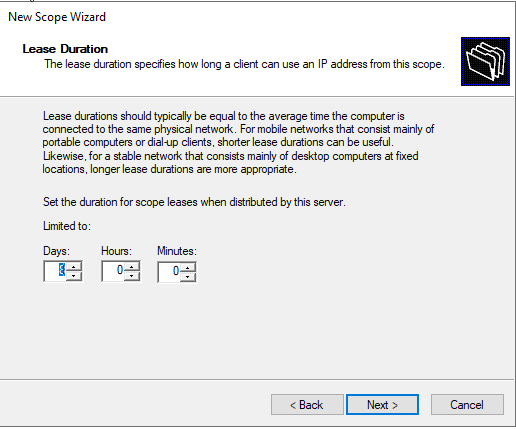
Add.When you are prompted to choose the lease duration, this depends on how long a typical host will be connected to the network. The default of 8 days is okay for our home lab use case.
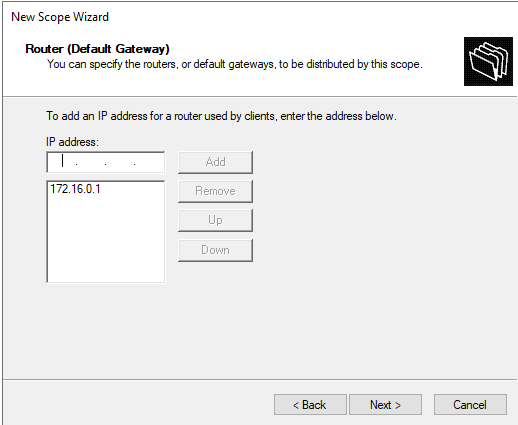
When prompted if you want to configure DHCP options for this scope now, choose Yes, I want to configure these options now, then select Next. You will then be prompted to select the IP address for the default gateway. The IP address we gave our default gateway was 172.16.0.1. Enter that and click on Add. Then select Next.
The pre-configured options in the Domain Name and DNS Servers are okay for our use case so select Next.
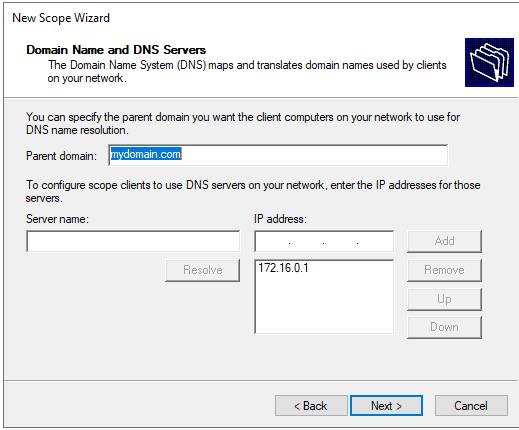
Domain Name and DNS Servers section.I am not configuring WINS so I will select Next on the WINS Server section. Then when prompted if you want to activate the scope now, make sure Yes, I want to activate this scope now is selected and hit Next then Finish.
You might need to refresh to see the changes.
Using a script to create multiple users
Next you can create users you want to have in your domain. You can do this manually as shown in the previous step where we created a domain admin account. You can use a script as well to quickly create multiple user accounts.
I will be modifying a script by Josh Madakor. The link for the script can be found below.
https://github.com/joshmadakor1/AD_PS/archive/master.zip
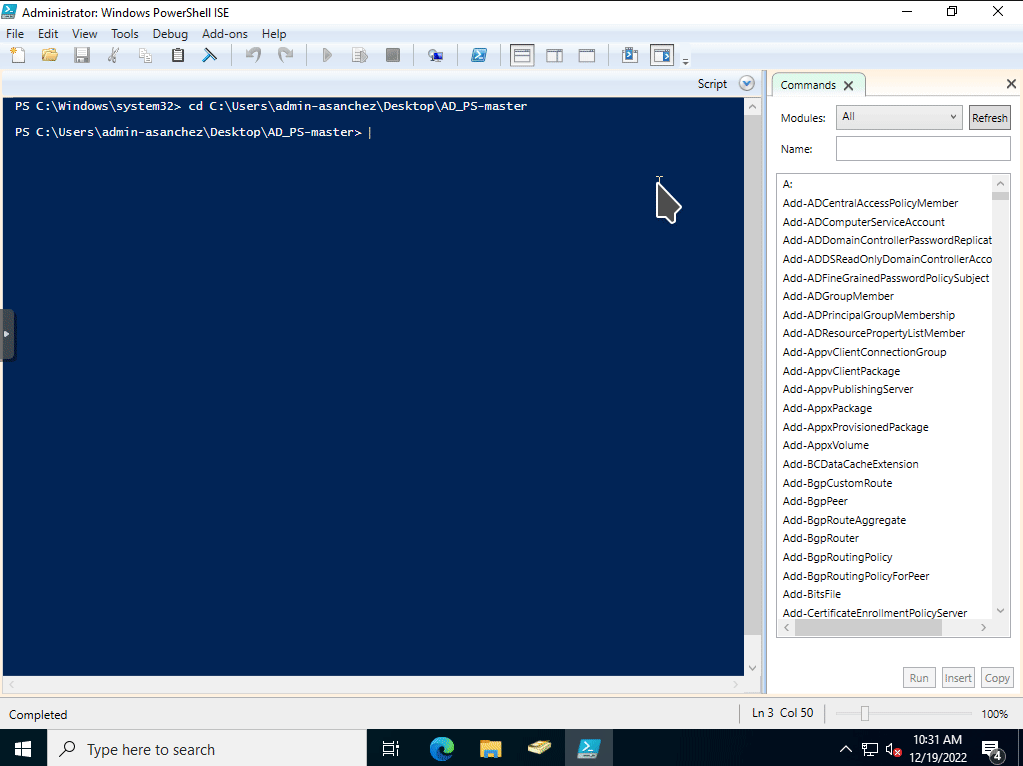
Download the .zip file on the Windows Server 2022 VM. I copied the extracted file to the Desktop. Then open up PowerShell ISE and run it as an administrator.
The first pre-requisite to run the script is to run the following command.
Set-ExecutionPolicy Unrestricted.
This is to allow the script to run on the server. You can restrict the policy after running the script if you would like.

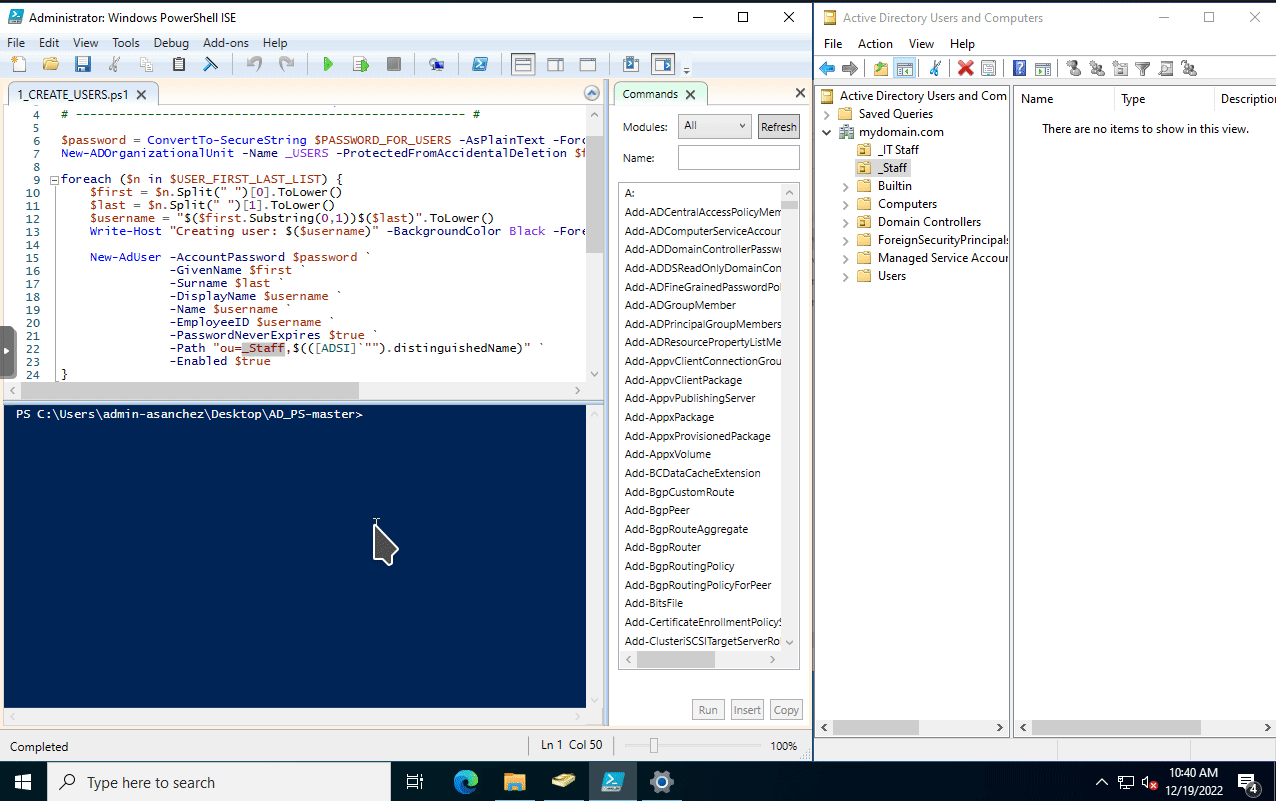
Tab after typing the first few characters to use tab completion.Enter dir to show the contents of the directory. The script is set to use the names.txt file but I created my own called staff.txt so I will modify the script to use this file instead.
Open up the PowerShell scripts in PowerShell ISE. Then change the file the script will use to generate the user accounts (from names.txt to staff.txt), the defaut password used (the script has it set at Password). Then change the OU the user accounts will be placed at. I changed it so that the new accounts will go to add users to the _Staff OU I created earlier.
After modyfing the script. save it then run the script. I have Active Directory Users and Computers window on the right. Refreshing it after running the script will show the newly created user accounts.
We can now begin configuring the Windows 11 VM.
Windows 11 Setup
Since we have already configured the Windows 11 VM, we are now ready to start it up under Proxmox. Go through the initial setup wizard. When you are prompted to sign in, select Sign-in options. Then enter the username and password for the local administrator of the PC.
I like to disable the telemetry options when prompted.

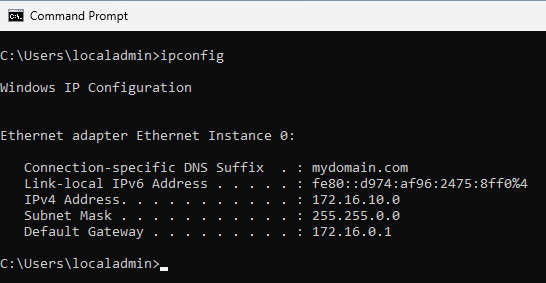
After Windows 11 finishes the setup process, you will be logged in to the account that you created earlier. When we open up a command prompt and run ipconfig, we see that the Windows 11 VM has a valid IP address.
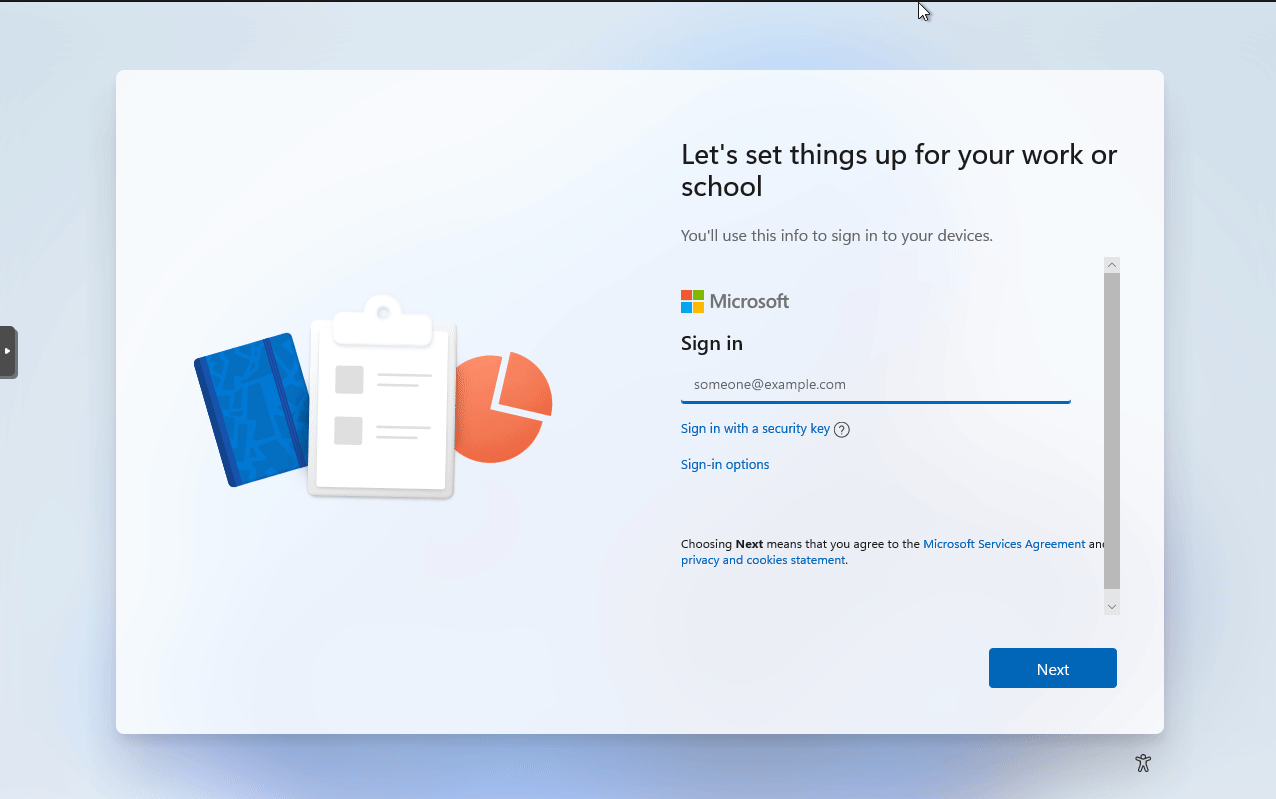
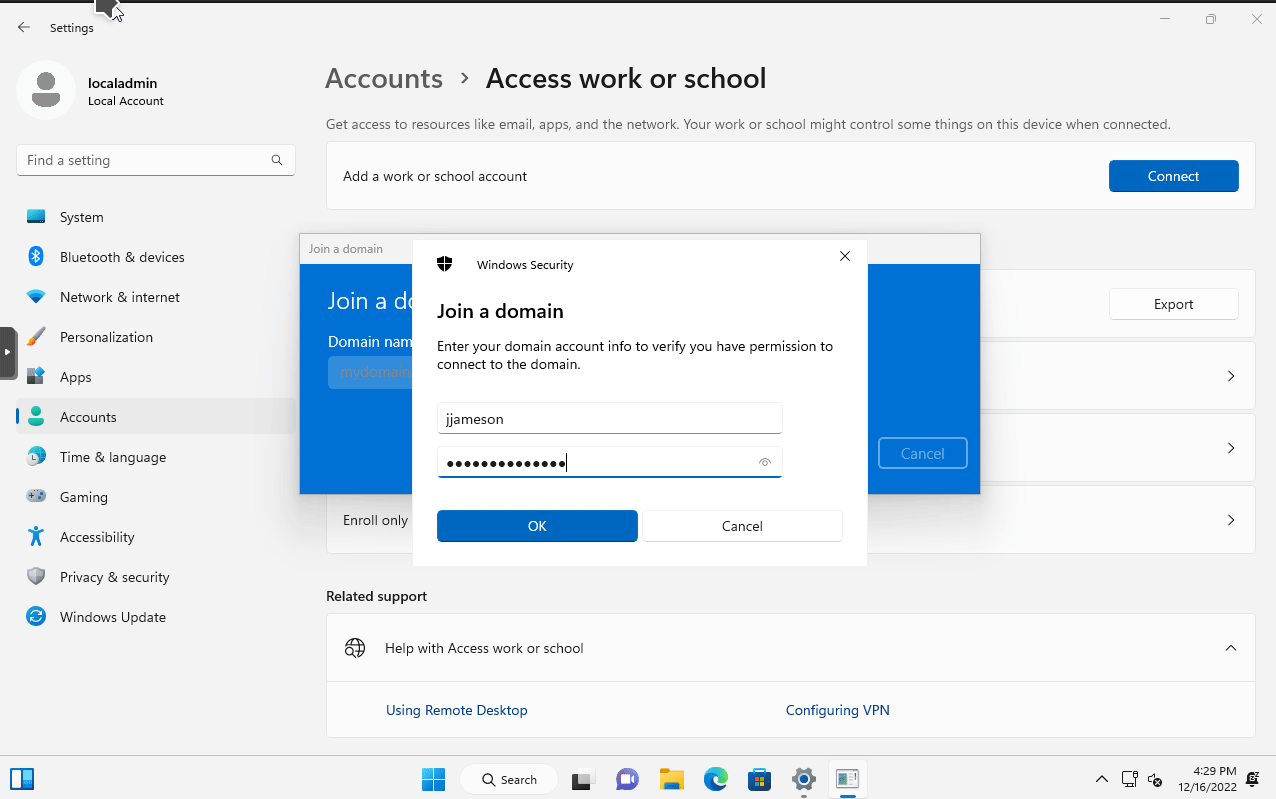
ipconfig in the Windows 11 VM.The next step is to join the Windows 11 VM to the domain. To do so, open the Settings program. Then go to Accounts > Access work or school. Then click on the blue Connect button. In the pop out window, select the option Join this device to a local Active Directory domain. Enter the domain name we used to configure our Active Directory forest (I used mydomain.com). You will then be prompted with a login prompt.
I entered the credentials for a user I created earlier, jjameson. I did not specify the account type as I want to see what default permissions are for the domain.
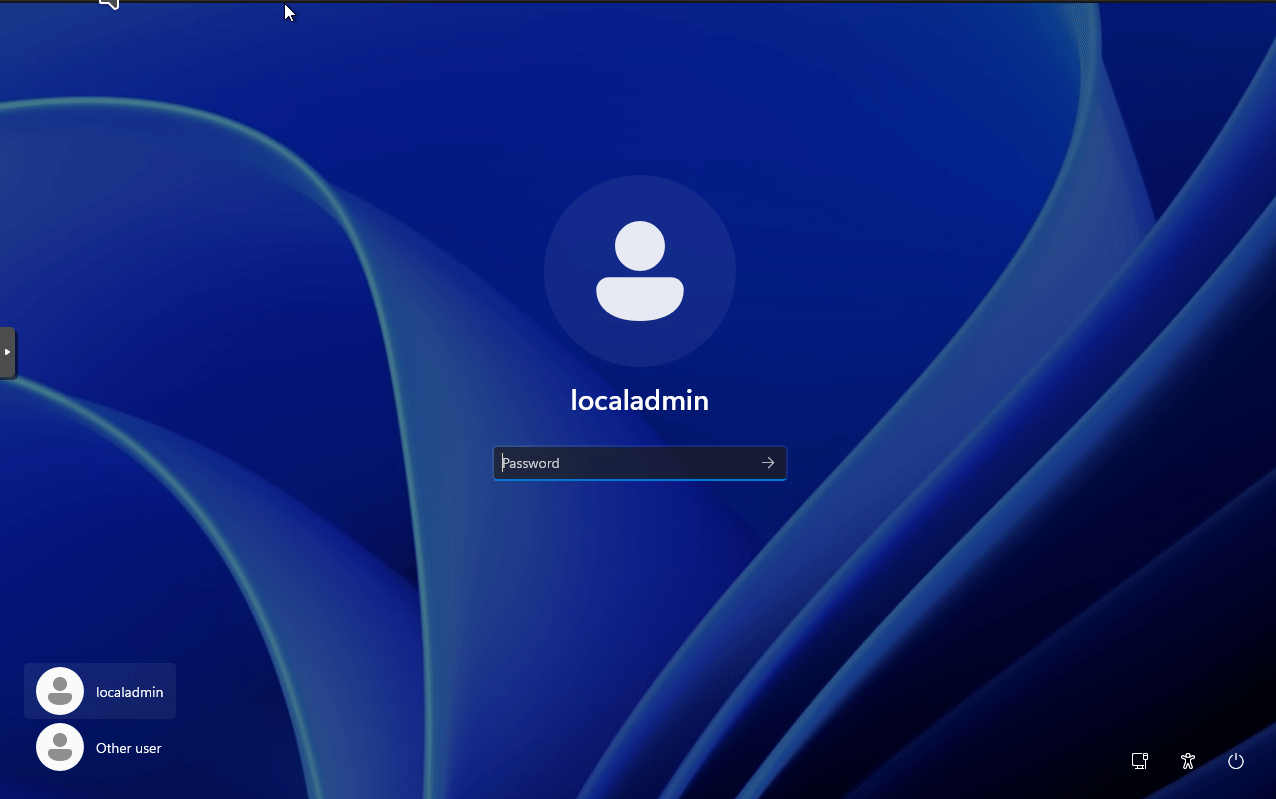
Windows 11 will restart after entering the credentials. After rebooting, you can now login to the domain by selecting Other User in the lower left corner.
Final thoughts
So now we have a working active directory home lab environment. There is still a lot of work to as we have to manage what permissions each OU has, as well as manage the group policies per OU, we can add storage to the domain controller and share access with only the users that require it. One issue I noticed is that when I added the jjameson account to the domain via the Windows 11 VM and skipped the step to set their permissions, I noticed that the user account would have the default permissions for the domain. After using the jjameson account for a few minutes, I noticed that there were a few access control policies I would like to implement. But this is a great way to get started and learn more about how to manage an Active Directory environment in a non-production environment. Because I am hosting the Windows Server in a VM in proxmox, I can also backup the VM, create snapshots, and easily restore to a previous point if I want to revert any changes that I make.